
When you ran your Android emulator on your computer, frequently you encountered that the emulator size showed up with inappropriate screen size. There are some ways that you can do to overcome that problem. Among others through Integrated Development Environment (IDE). Nevertheless the problems happened is that IDE (such as android studio) you used couldn't run your command to resize your emulator screen. Therefore, in this tutorial I will tell you the solution how to change emulator screen size that has showed up through your IDE (such as Android Studio). We will use telnet that generally available on your Windows, especially windows 8 that I use to practice this tutorial. as for the steps you need to do are:
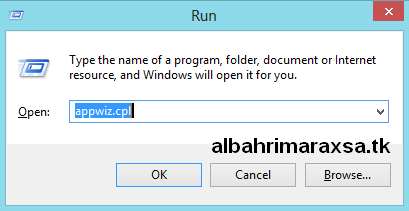
- Open uninstall panel by pressing "Windows button + R" → after panel is opening, type appwiz.cpl→ and then press OK.

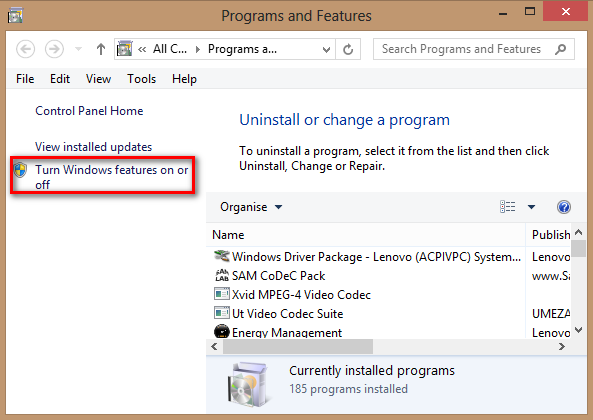
- after that, Program and Features panel will be shown. Then click Turn Windows features on or off at the left panel.

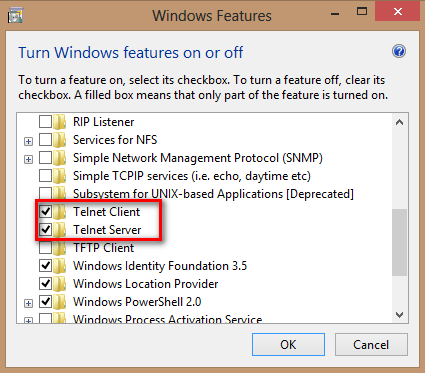
- after that tick on Telnet Server and Telnet Client and then press OK
- in this steps, the configuration of telnet telnet is finish.
- your Telnet Client and Telnet Server Activation is done, then run Android Emulator (such as IDE Android Studio, Eclipse, etc).
- The emulator screen size may be shown inappropriately. So that some of the emulator screen is not shown. Next steps are changing the window scale of your emulator window to be smaller.
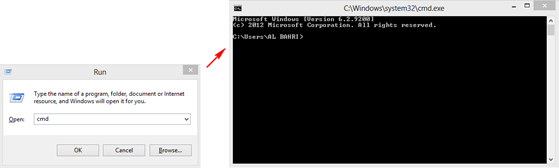
- Open Command Prompt by “pressing Windows button + R → then type cmd”
- then type cd\ → Enter.
- type telnet localhost 5554 (the port number according to your localhost port that shown on your emulator screen), this port number must be match.

- After typing telnet localhost 5554, then type help. Help command is usually used before defining emulator window scale that we will change later.
- after that, type “window scale 0.3″. You can try 0.1 till 0.4 to scale the windows size as you need.


EmoticonEmoticon